Building a 48V LiFePO4 Battery bank: Cell Selection, Compression, BMS & Real-World Lessons
LiFePO₄ batteries have changed off-grid power systems dramatically. High cycle life, strong charge and discharge performance, and falling cell prices now make it practical to build very large battery banks without spending what commercial battery systems used to cost. But the quality of the finished battery depends on a lot more than simply bolting 16 cells together. Cell condition, bus bars, cable resistance, compression, insulation, BMS selection and even the physical layout of the pack all affect how the battery performs.
Why Build Your Own Battery?
For my own systems, I generally prefer building batteries from individual LiFePO₄ cells rather than buying a completely pre-built battery.
The biggest reason is control. When I build the battery myself, I choose the cells, the BMS, the bus bars, the cable sizes, the compression system and the physical layout. I can see every connection, understand how the battery is put together and repair or replace individual components later if something fails.
I’ve built several batteries using Gobel kits, including batteries used in my own home. I like that approach because it gives you a professionally made enclosure and compression system while still allowing you to choose and understand the major components inside the battery. For someone comfortable working with high-current DC systems, I think that offers a lot of advantages over many sealed pre-built batteries.
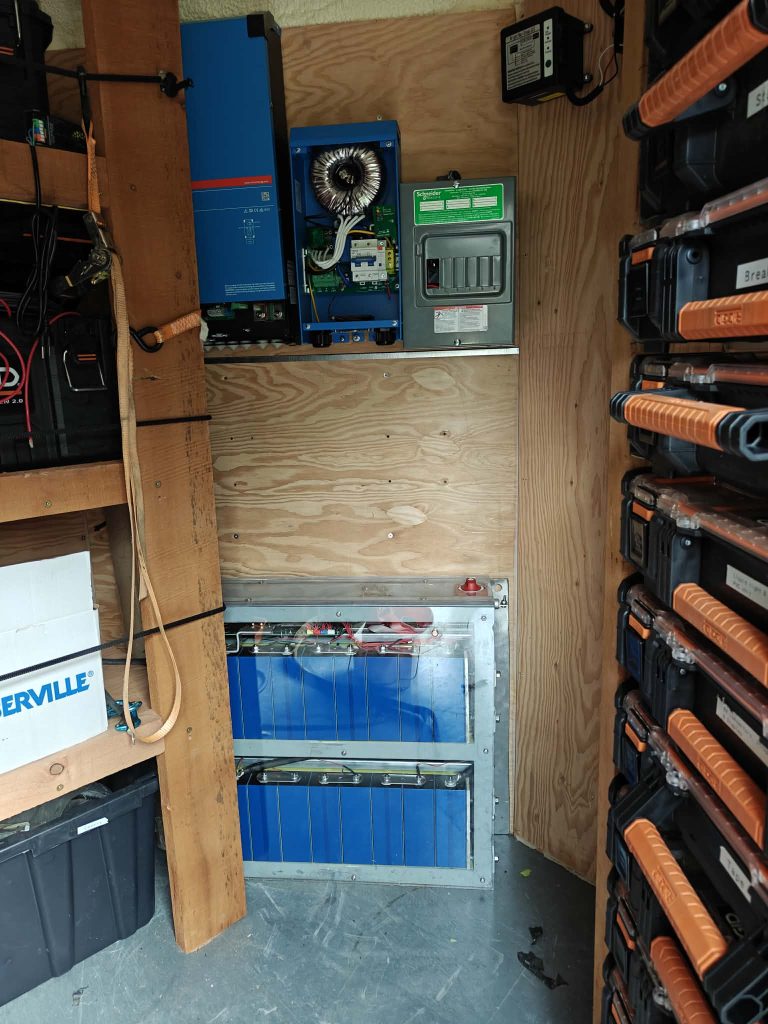
That doesn’t mean factory-built batteries are bad. There are excellent products on the market, and certified batteries are necessary for many permitted installations. My preference comes from serviceability and transparency. I would rather own a battery that I can open, inspect, test and repair than one that is essentially a sealed black box.
Building your own battery also means taking responsibility for the engineering. Cell compression, insulation, overcurrent protection, conductor sizing, BMS settings and mechanical construction all matter. Done poorly, a DIY battery can absolutely create problems. Done properly, however, it allows the battery to be designed around the application rather than designing the application around the battery.
“I would rather own a battery I understand and can repair than a black box I’m not supposed to open”
Two Approaches: Kit Build vs Custom Build
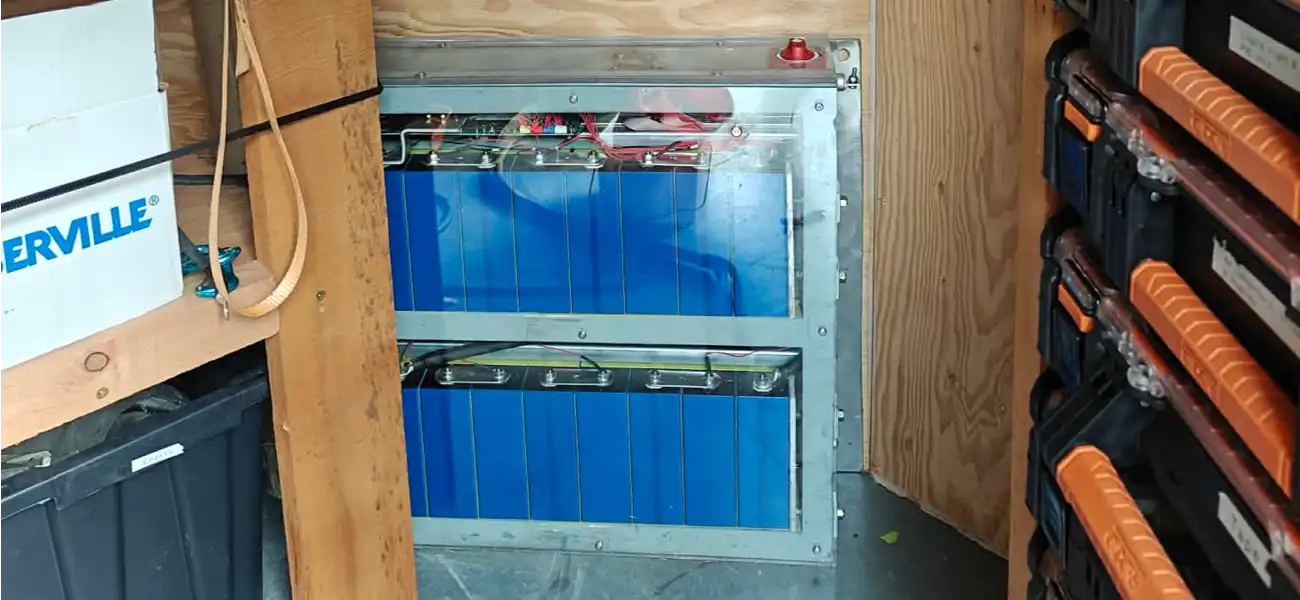
For my last couple of battery builds, I used Gobel-style kits built around the larger MB56 cells. They use a 300 amp BMS and make a clean, convenient stationary battery because most of the enclosure, compression system and internal layout are already worked out.
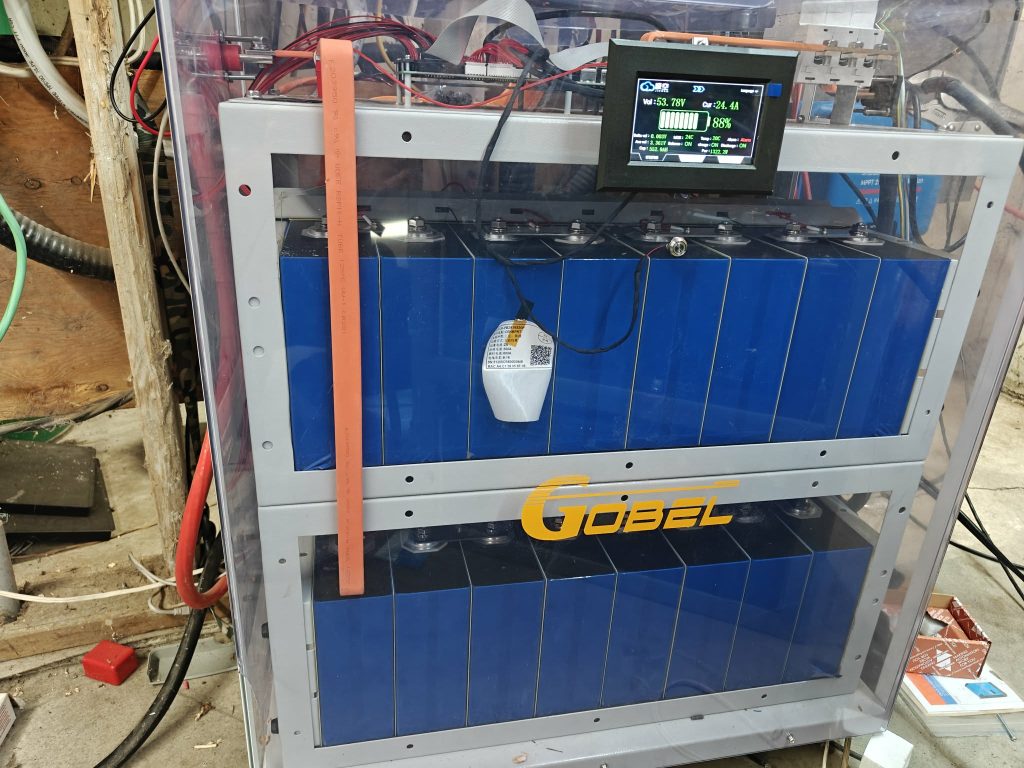
For my mobile work trailer, I wanted a different balance of capacity, size and weight. I still wanted a 300 amp BMS so I could support a larger inverter and high-current loads such as a welder, but I didn’t need the size or weight of the MB56-based pack. I chose the smaller MB31 cells, which allowed me to build a more compact battery while keeping the high-current capability I wanted.
The enclosure was another reason to go custom. The Gobel packs work well in stationary installations, but their clear exterior panels and caster-style base aren’t really designed around being permanently restrained in a moving trailer. There isn’t an obvious structural mounting surface for fastening the whole battery solidly to a wall.
For this build, I fabricated my own frame and incorporated a substantial aluminum back plate into the battery structure. That gives me a solid mounting surface that can be mechanically fastened directly to the trailer wall. The custom layout also lets the battery sit tighter to the wall, which saves valuable space inside the trailer.
Cell Selection: Why I Standardized on EVE
There are a lot of LiFePO₄ cell manufacturers and a wide range of capacities available. For my own builds, I have chosen to standardize around EVE cells.
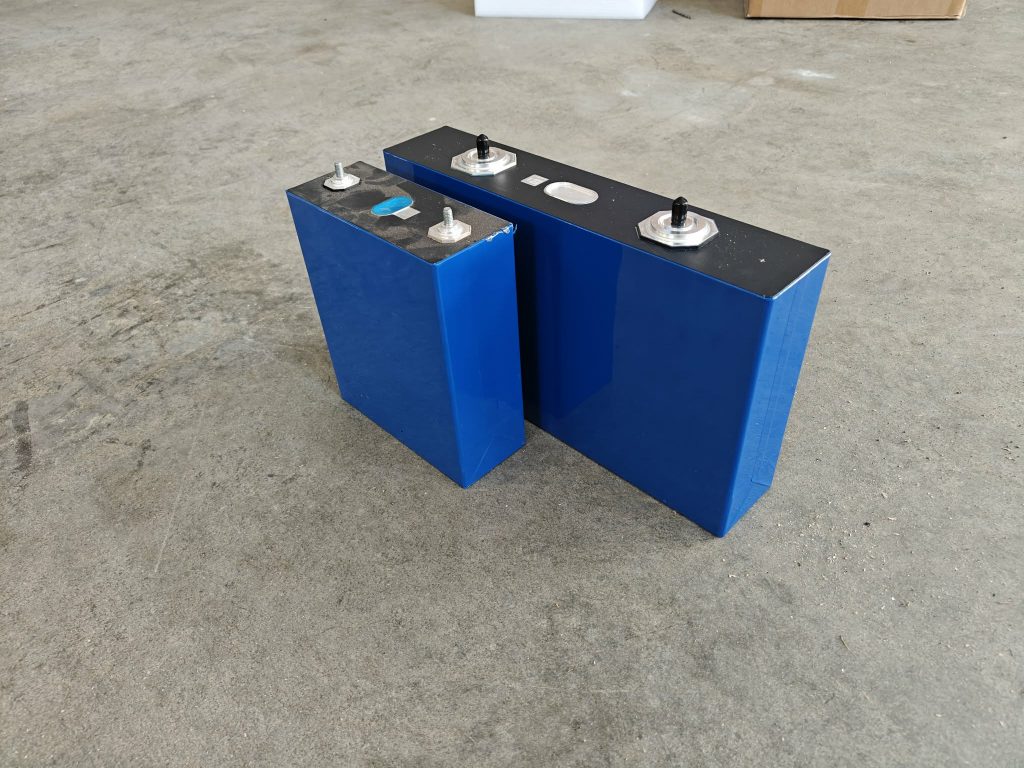
Part of that decision is familiarity. EVE cells are widely used in DIY and commercial battery builds, there is a huge amount of real-world information available on them, and I already have experience working with their different cell sizes. That makes it easier for me to compare performance, understand their physical dimensions, plan compression systems and keep spare parts and hardware consistent between builds.
I wouldn’t claim that EVE is automatically the best cell manufacturer in every situation, but they have become the platform I know well and trust enough to keep using. For me, there is value in standardization rather than constantly changing brands just because another cell is slightly cheaper or has a different advertised specification.
For this particular build, I chose the smaller MB31 cells instead of the larger MB56 cells I had used in previous Gobel builds. The decision was mainly about size, weight and packaging. The trailer did not need the maximum capacity of the larger cells, but I still wanted a compact pack capable of supporting a 300 amp BMS and a large inverter.
Cell Compression and Mechanical Construction
Large prismatic cells shouldn’t simply be stacked together and held with tape. In a mobile application especially, the battery needs to be treated as a mechanical assembly as much as an electrical one.
For this build, I kept the cells upright so their weight is carried through the base of the cells rather than through the terminals or bus bars. The cells are compressed together laterally, but I also restrained the pack vertically so the individual cells can’t bounce or work themselves loose as the trailer moves. The electrical connections should never be expected to hold the cells mechanically in place.
I also installed insulating barriers between every cell rather than relying on the factory shrink wrap. The factory wrapping provides electrical insulation, but it is thin and can be damaged by abrasion, sharp edges, movement or contamination over years of service. The aluminum cell cases themselves are conductive, so an additional insulating layer between adjacent cells provides another level of protection if the original wrapping is ever compromised. In a stationary battery that matters; in a trailer that is constantly being subjected to vibration, it matters even more.
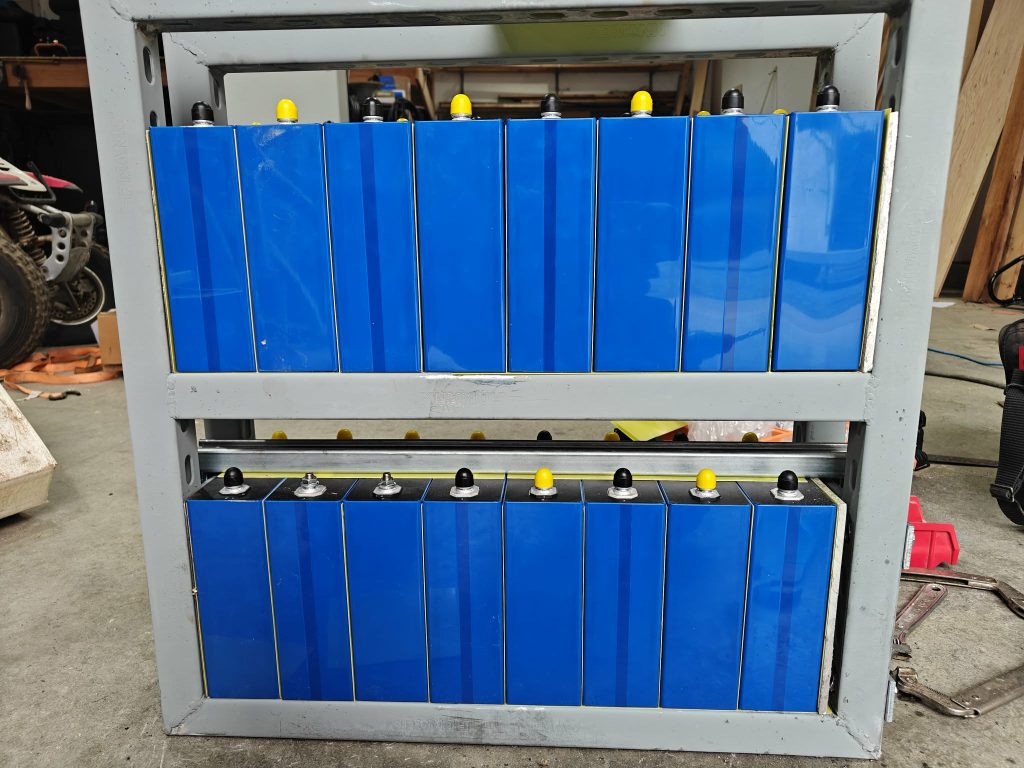
For the frame, I used Unistrut, spring nuts and threaded rod. Nothing exotic. Unistrut is basically Lego for tradespeople: inexpensive, readily available and easy to modify as the design evolves. It allowed me to build a rigid frame around the cells, apply controlled restraint and tie the whole assembly back into the aluminum mounting plate.
One of the things I like about building batteries this way is that the mechanical structure is obvious and serviceable. If I want to change something later, I can unbolt it and modify it rather than cutting apart a proprietary enclosure.
BMS Selection, Settings and Control
One of the biggest advantages of building my own batteries is having direct control over the BMS rather than relying on settings and operating logic chosen by the battery manufacturer.
For this build, I used a JK 300 amp BMS. The high current capability is important because this battery is intended to support a larger inverter and loads such as a welder, but the other reason I like the JK platform is how much access it gives me to the battery itself. I can monitor individual cell voltages, see balancing activity, adjust charge and discharge limits and change protection settings to suit the application.
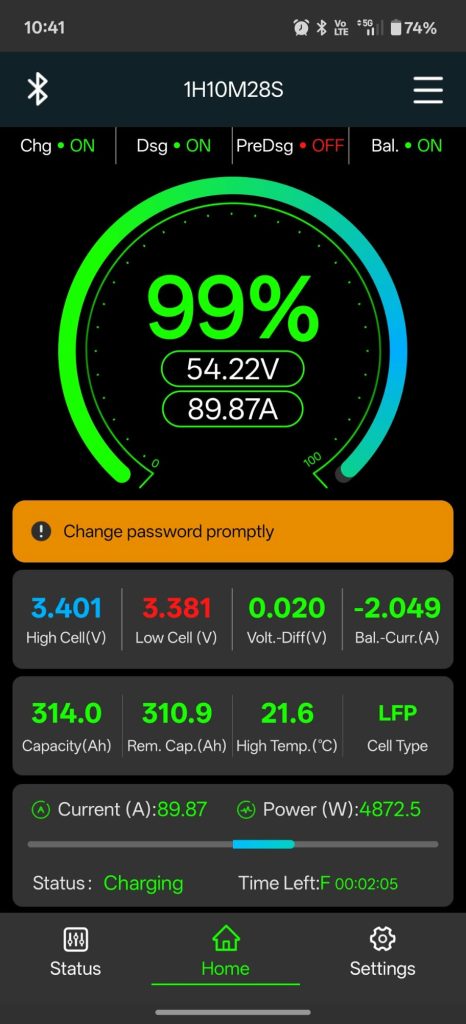
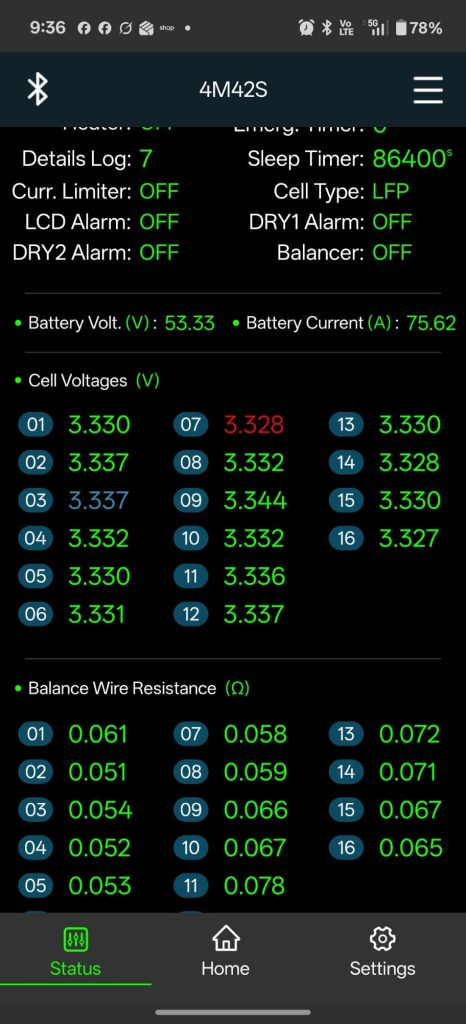
I generally prefer to operate my batteries somewhat conservatively rather than constantly pushing the cells to their absolute upper and lower limits. Maximum usable capacity is not always the goal. For a system I expect to own and service for years, I would rather give up a small amount of theoretical capacity in exchange for gentler operating limits and less stress on the cells.
That is one area where I sometimes disagree with the logic built into finished batteries. Some pre-built batteries use fixed charging behavior or require the battery to reach a relatively high voltage before certain BMS functions reset or synchronize. In one Ruixu system I worked with, for example, the battery wanted to see around 56 volts as part of its normal BMS behavior. I personally prefer not to run my batteries that hard unless there is a good reason to do it.
A configurable BMS lets me decide what is appropriate for the actual application rather than accepting somebody else’s settings. It also makes troubleshooting much easier because I can see what every cell is doing instead of treating the battery as a sealed box.
CAN Communication If your inverter supports CAN communication, choose a BMS that can communicate directly with it. This allows the BMS to report SOC, alarms, and charge/discharge limits so the inverter can react before the battery reaches a hard shutdown condition. CAN integration quality varies significantly between BMS manufacturers, so compatibility and firmware maturity matter.
A Real-World Example: Why BMS Control Matters
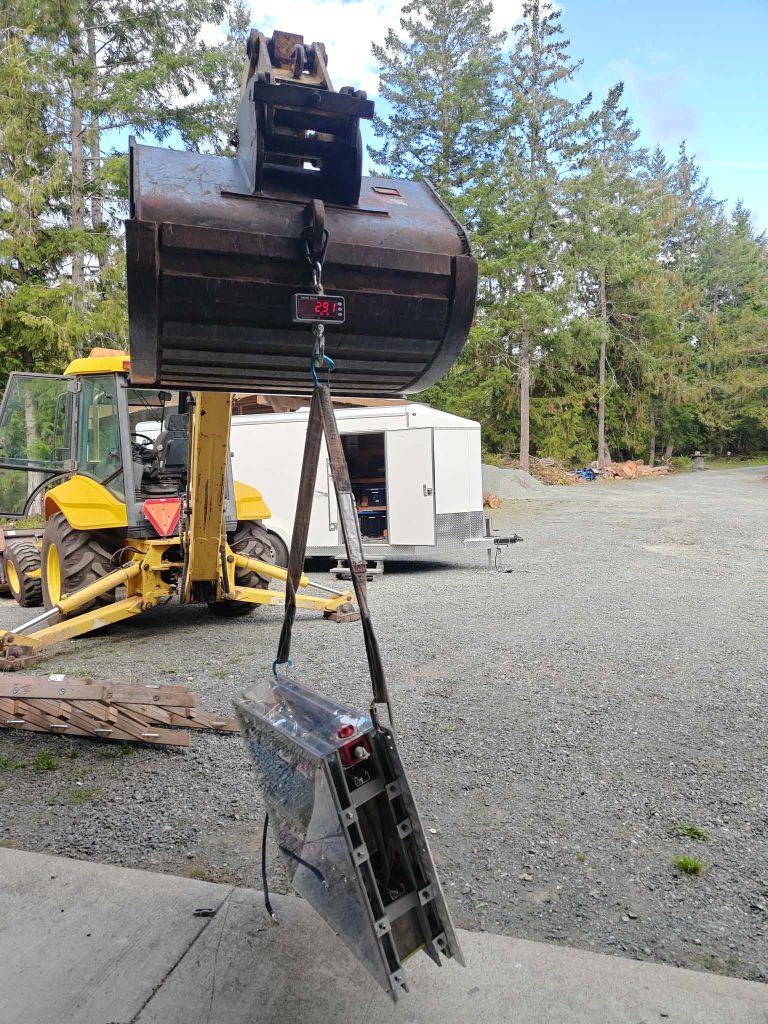
One experience that reinforced this for me was testing a Ruixu battery in cold conditions. I literally lowered the battery into a freezer with my backhoe because I wanted to see how the internal heater and BMS logic actually behaved, rather than simply trusting the specifications.
During testing, I found that a small incoming charge current could trigger the battery heater. Under the wrong conditions, the heater could consume enough energy to work against the charging process and eventually drive the battery into an undesirable BMS state.
I went back and forth with Ruixu’s engineers, explained what I was seeing and provided the results of the testing. They eventually changed the heater control logic for my battery.
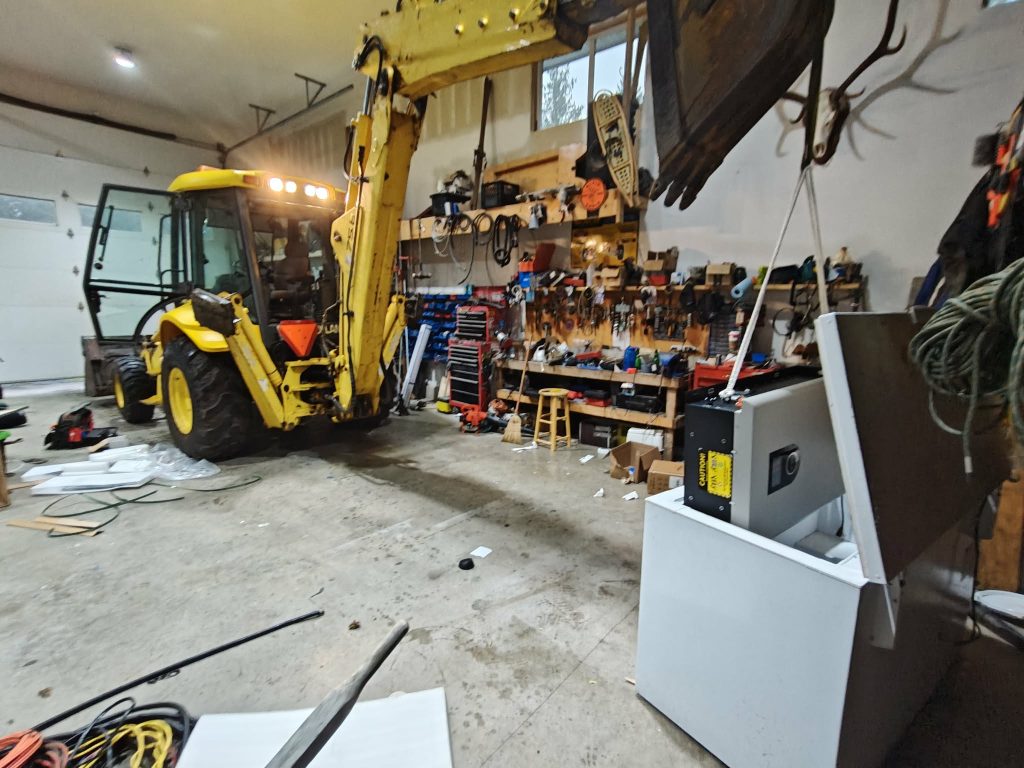
To their credit, they were willing to work with me. But the experience reinforced why I value equipment that gives me access to the settings and logic. If I’m relying on a battery at a remote site, I want to understand what it is doing and have the ability to change it when something doesn’t make sense.
Bus Bars, Cabling and High-Current Design
When you start asking a battery to supply several kilowatts continuously — or short periods of very high current for loads such as a welder — the resistance of everything between the cells and the inverter starts to matter. The cells are only one part of that current path. Bus bars, cable length, cable size, lugs, connections and even the BMS itself all contribute resistance.
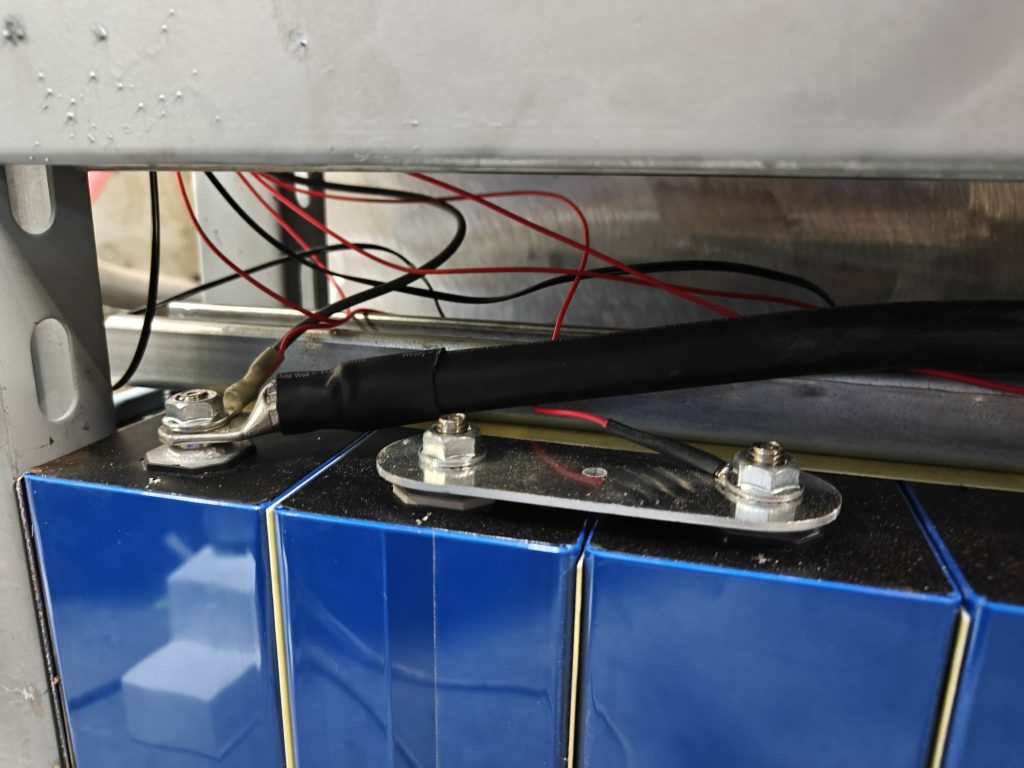
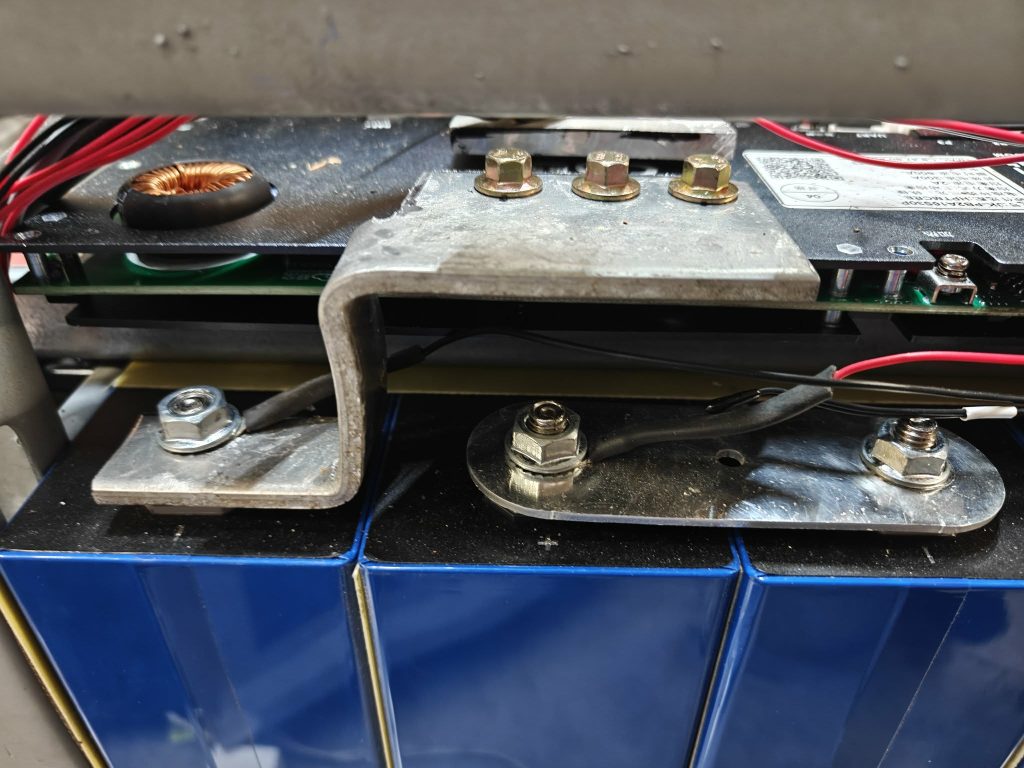
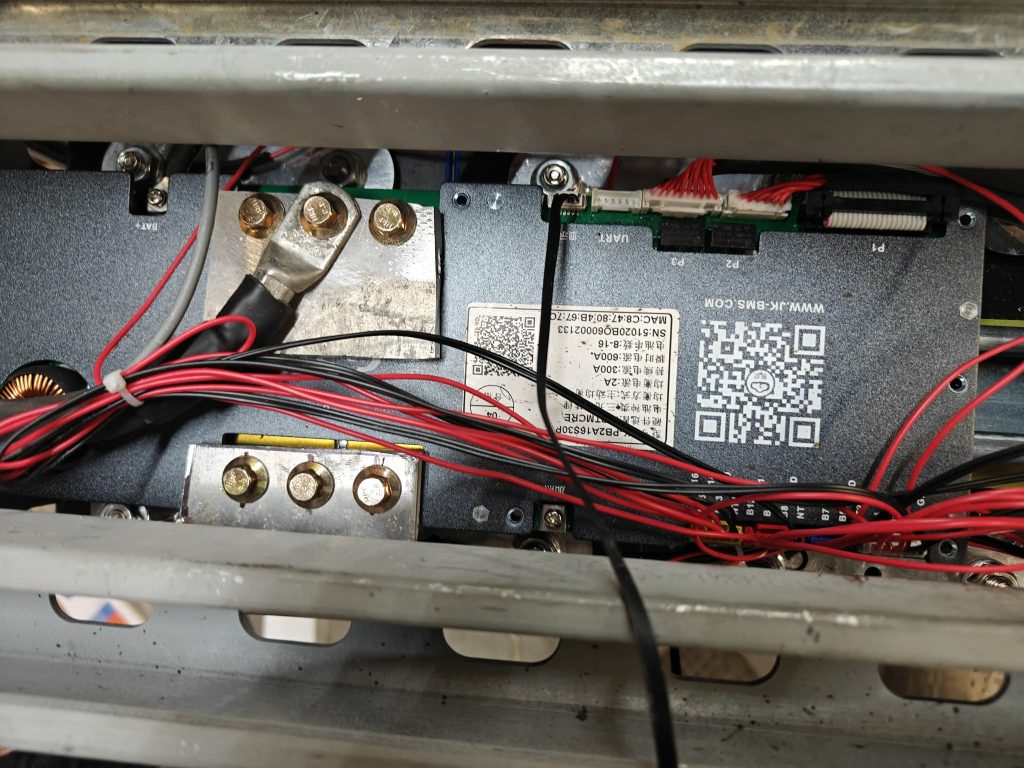
On this build, I deliberately made the high-current path as heavy and direct as practical. I fabricated my own bus bars, minimized unnecessary connections and used short, heavy conductors between the battery, BMS and DC distribution. Each individual improvement may only represent a very small reduction in resistance, but at hundreds of amps those small differences become measurable voltage drop and heat.
An interesting result showed up when I paralleled this new MB31 battery with one of my existing MB56-based Gobel packs. The MB31 cells have roughly half the capacity, and you would normally expect the larger cells to have an advantage in cell-level internal resistance. Despite that, under load the new custom battery consistently seems to contribute more current.
That doesn’t necessarily mean the MB31 cells themselves are outperforming the MB56 cells. Parallel batteries share current according to the total resistance of each complete current path. Cell resistance is part of that, but so are the bus bars, BMS, cables, terminals and every connection between the cells and the common DC bus. A battery with smaller cells can still carry more of the load if the rest of its electrical path has sufficiently lower resistance.
This is one of the reasons I pay so much attention to seemingly minor construction details. At low current, an extra connection or a little additional cable length may be almost irrelevant. At 200 or 300 amps, milliohms matter. Lower resistance means less voltage drop, less wasted energy as heat and better ability to support large transient loads.
“At high current, the battery isn’t just the cells. Every bus bar, lug, cable and connection becomes part of the battery“
Certification, Code Compliance and Why the Rules Exist
I’m not going to pretend I love being told what equipment I can and cannot use. One of the reasons I build my own equipment is that I like understanding it, modifying it and deciding for myself how it should operate.
But there is another side to that argument.
A large lithium battery can deliver an enormous amount of current. A loose connection, inadequate bus bar, damaged insulator, poorly restrained cell or incorrectly configured protection system can turn into a serious problem very quickly. LiFePO₄ is a relatively thermally stable lithium chemistry, but that doesn’t make hundreds of amps of available fault current harmless.
That is ultimately why certification and electrical-code requirements exist. With a certified product, somebody other than the installer has evaluated the enclosure, electrical protection, abnormal operating conditions and failure modes against an established standard. A custom-built battery does not come with that independent verification.
For my own equipment, I’m comfortable taking responsibility for those decisions because I understand what I built and I can inspect, test and repair it. That is very different from assuming that anybody can bolt sixteen cells together, install a BMS and call it a safe battery.
“The freedom to build it yourself comes with the responsibility of knowing exactly what happens when you get it wrong.“